
Settings - Categories
Create and manage the email categories the AI uses to classify your inbox, with colors, keywords, and active status.
Objective
Categories are the labels the AI uses to classify incoming email. Each active category, together with its description and keywords, guides the classifier. When a category is assigned to a message, Helios can mirror it as a label in Gmail or a category in Outlook on the connected mailbox.
Access
Sidebar -> Inbox -> open an email account and its settings -> Manage Categories.
Route(s): /app/{tenant}/settings/categories
When opened from Inbox, the URL carries from=inbox and config=\{id\}, and the top-left button reads Back to Inbox Settings. Opened directly, that button reads Back to Settings.
Roles
- Any workspace member who can open the page. Without a valid workspace, the page redirects to /unauthorized.
- Creating, editing, deleting, or enabling/disabling a category requires a verified email address.
Prerequisites
- A verified email address. Restricted (unverified) accounts cannot save changes.
- Optional: a connected email account, so the AI classifies inbound mail using these categories.
Category list
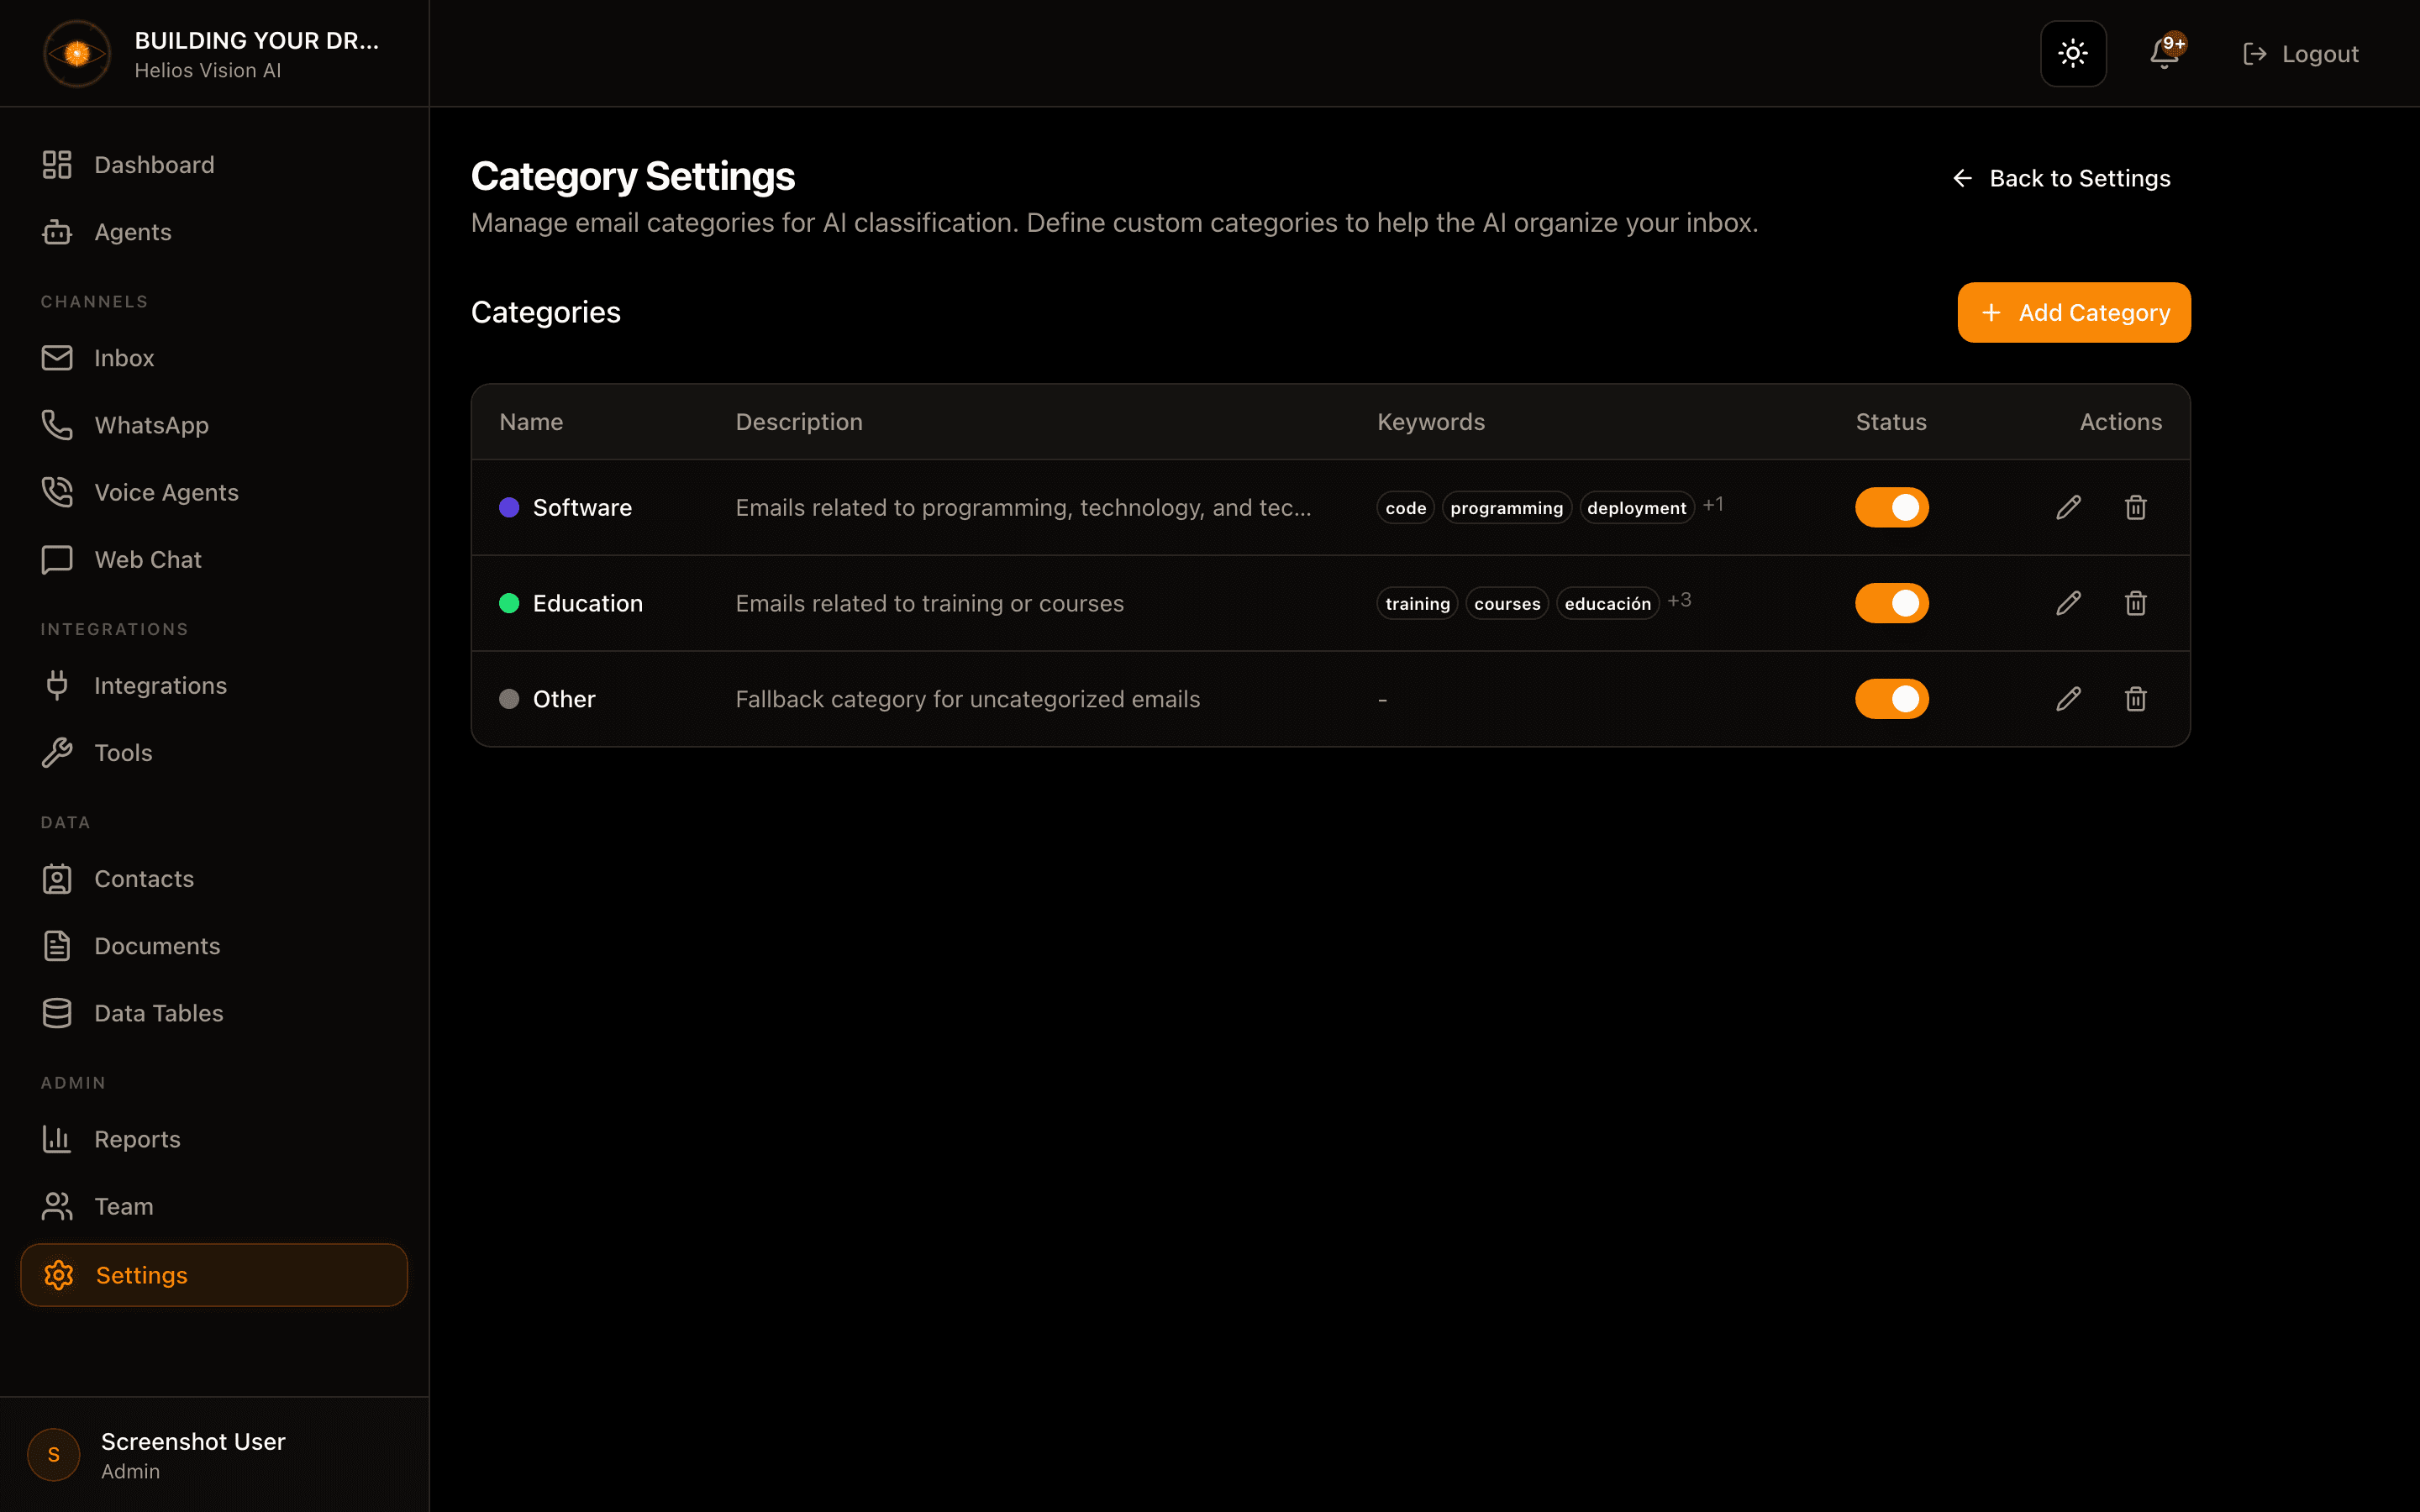
The table shows every category for the workspace.
| Column | Content |
|---|---|
| Name | Category name, preceded by a color dot |
| Description | Optional context shown to the AI (or - when empty) |
| Keywords | First three keywords as chips, plus +N when there are more (or - when empty) |
| Status | Active toggle (see Enable / disable) |
| Actions | Edit (pencil) and Delete (trash) buttons |
When no categories exist yet, the table shows: No categories found. Create one to get started.
Create category
- Click Add Category.
- Complete the New Category dialog.
- Click Save Category.
Fields:
| Field | Mandatory | Format | Example | Note |
|---|---|---|---|---|
| Name | Yes | text | Technical Support | Category name (used verbatim by the AI) |
| Description | No | text | Issues and bugs | Extra context for AI classification |
| Color | No | hex | #94a3b8 | Badge color; pick with the color picker or type the hex. Defaults to #94a3b8 |
| Keywords | No | comma-separated text | urgent, error, bug | Split on commas into individual keywords |
Edit category
- Click the Edit (pencil) icon on the row.
- Adjust the fields and click Save Category.
Enable / disable
- Toggle the Status switch on the row.
- The change saves immediately.
- Only active categories are offered to the AI classifier; inactive ones are kept but ignored.
Delete category
- Click the Delete (trash) icon and confirm in the dialog.
- This action cannot be undone.
- Removing a category clears it from any emails it was assigned to. The emails themselves are not deleted.
How the AI uses categories
- Only active categories are sent to the classifier, listed with their description and keywords.
- The AI picks the best-fitting category for each incoming email.
- Optional fallbacks - using an Other category, or letting the AI suggest new category names - are configured per email account in Inbox settings, not on this page.
Good practices
- Use short, clear names; the AI reads them verbatim.
- Add a Description and Keywords so the classifier has context.
- Keep a broad catch-all (for example, Other) so unclear email still lands somewhere.
- Disable instead of deleting when you are unsure, so past assignments stay intact.
Common notes
- Categories are listed by internal priority and then by creation date.
- Label and category mirroring applies only to connected Gmail and Outlook mailboxes.
- If a save fails, a toast reports it and the change is not applied; verify your email address first.
Related
Settings — General
Configure your workspace: profile name, organization name, timezone, interface language, AI engine, branding, plan usage and account deactivation.
Notifications
Review workspace alerts and channel events: escalations, billing, integration and plan warnings — filter, search, and mark as read.