
Connect WhatsApp via Meta (Cloud API)
Step-by-step guide to connect a WhatsApp Business number directly to Meta Cloud API — no intermediaries, with screenshots for every step.
Objective
Connect a WhatsApp Business number to Helios directly through the Meta WhatsApp Cloud API, without an intermediary like Twilio. You create and configure an app on Meta for Developers, paste the credentials into Helios, and Helios handles the parts that historically caused silent failures (the WhatsApp Business Account subscription, the verify token, and the webhook URL).
Meta Cloud API is the recommended provider: you pay Meta's own pricing with no middleman markup, you keep direct control of your app, and you get new WhatsApp API features first.
Access
Sidebar -> WhatsApp
Route: /app/{tenant}/whatsapp
The Meta setup guide is embedded inside the connection flow: click Connect New Number, choose Meta Cloud API, and the step-by-step guide (plus the Webhook URL and Verify Token you'll need) appears at the top of the form.
Roles
- View the WhatsApp page and conversations: owner, admin, agent (account must be active).
- Connect, edit, or delete a number (this guide's flow): owner or admin only.
- Message Templates: owner or admin, and only for Meta connections.
- A faster one-click onboarding (Connect with WhatsApp) is rolling out gradually. If you don't see it, this manual guide works for everyone — contact support to check availability.
Prerequisites
Before you start, make sure you have:
- A plan that includes WhatsApp and available number capacity. Without it, the connect action returns an upgrade prompt.
- A Meta for Developers account (free — you can use your Facebook account).
- A Meta Business account (created automatically when you create an app, or reuse an existing one). Business verification is optional to get started.
- A phone number for WhatsApp Business that is not registered on regular WhatsApp. Registering it here deregisters it from the consumer app.
- A valid payment method (credit or debit card) to attach to the WhatsApp Business Account (WABA). The cost is small (~$0.005–$0.02 USD per conversation), but Meta requires it for AI phone numbers.
- An agent that is active and has the WhatsApp channel enabled (a number can only be set Active when an assignable agent is chosen).
About Meta's "1,000 free service conversations / month": this free tier exists, but it does not apply to AI phone numbers. Without a payment method on file, Meta silently drops every inbound message — no error in the Meta dashboard, no rejection in Helios. See Step 8.
What Helios automates for you
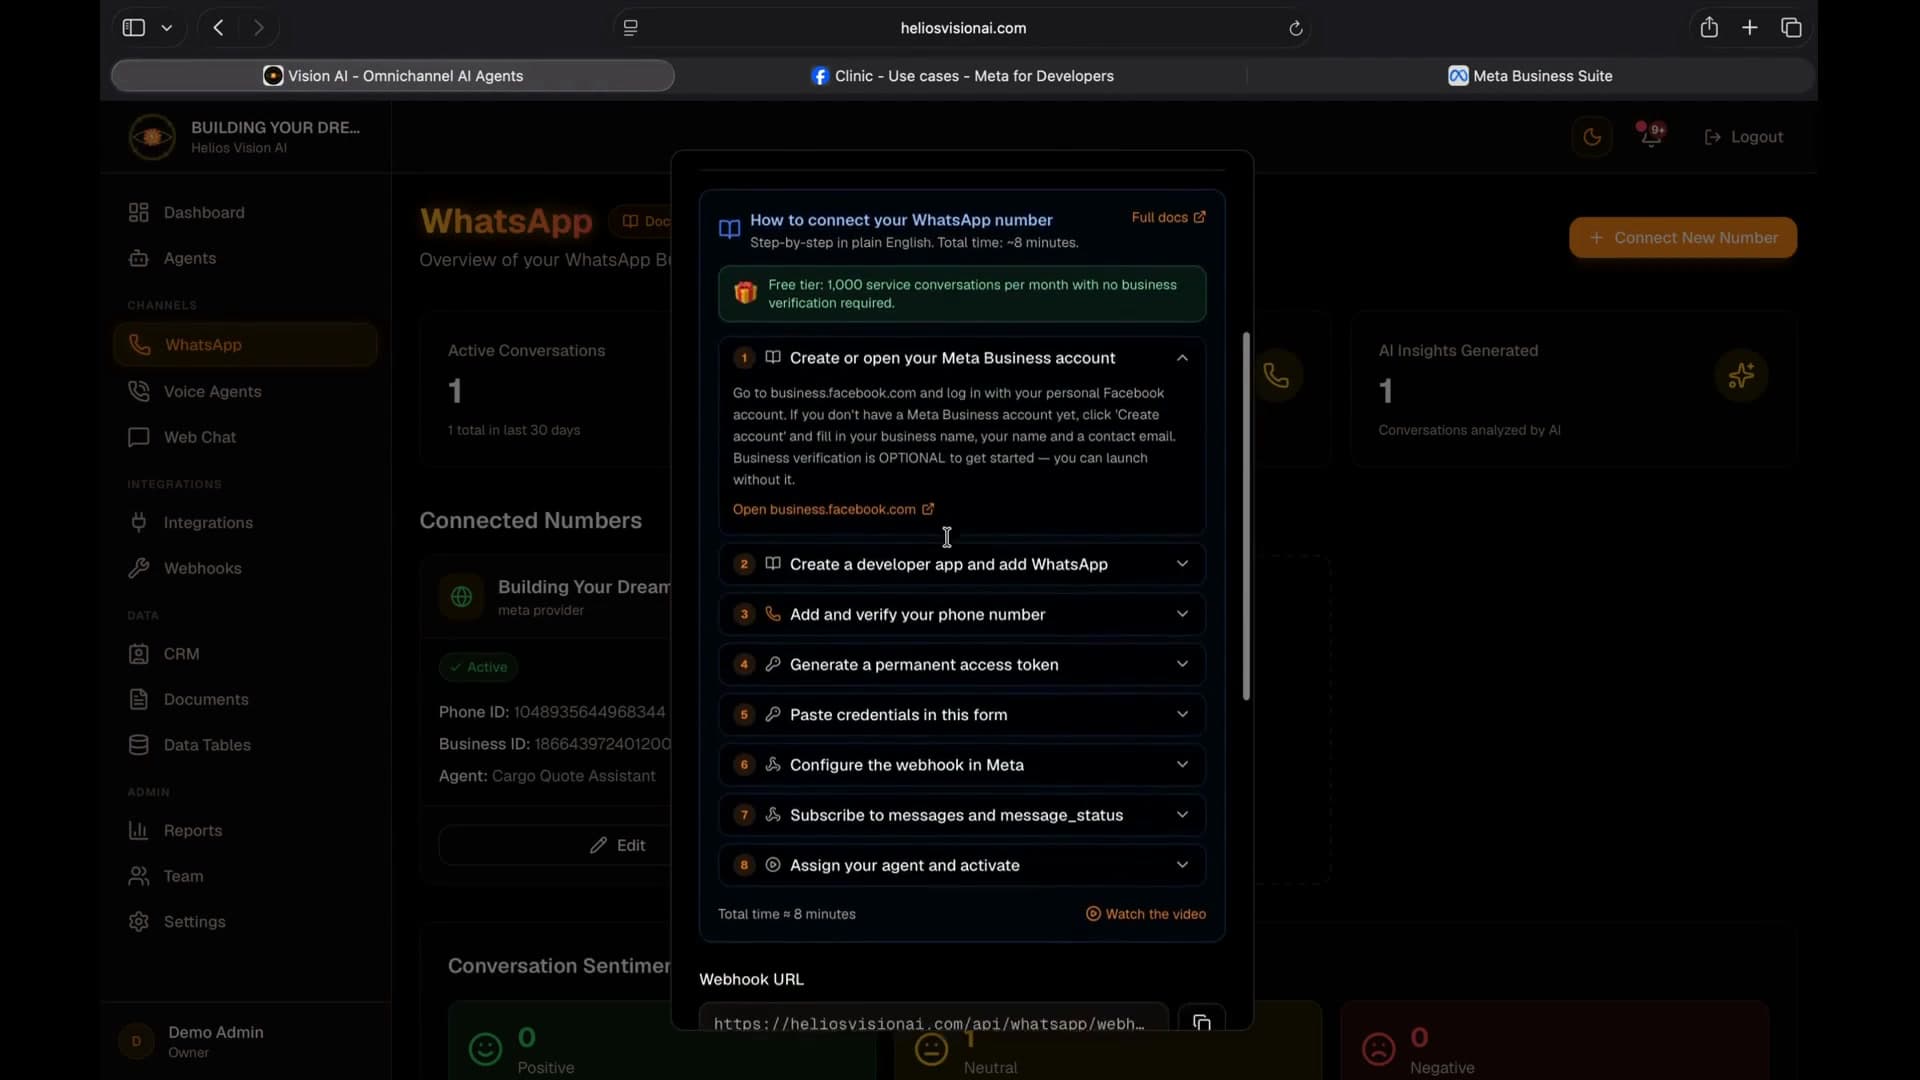
Several configuration steps that used to break new tenants silently are handled by Helios when you click Connect Number:
Helios does this automatically — you don't need to do it in Meta:
- Webhook URL is generated from your production domain (no manual construction).
- Verify Token is generated as a secure random string (
hv_...) and saved before you paste it into Meta, so Meta's verification GET passes while you're still filling the form.- WABA-level app subscription is registered against Meta's Graph API (
POST /{waba_id}/subscribed_apps) so your app actually receives webhooks. This is the step that most guides forget.- Business Account ID auto-detection: if you provide only the Phone Number ID + Access Token, Helios queries Meta and fills the Business Account ID for you.
- After a successful Test Connection / Connect Number, Helios clears any stale "unhealthy" flag from a previous token.
You still perform Steps 1–7 in Meta yourself (creating the app, registering the phone, generating the token, and configuring the webhook URL/Token in the Meta dashboard). The two-level webhook concept is explained in Step 7.
Part 1: Set up in Meta
Step 1 — Create or open your Meta Business account
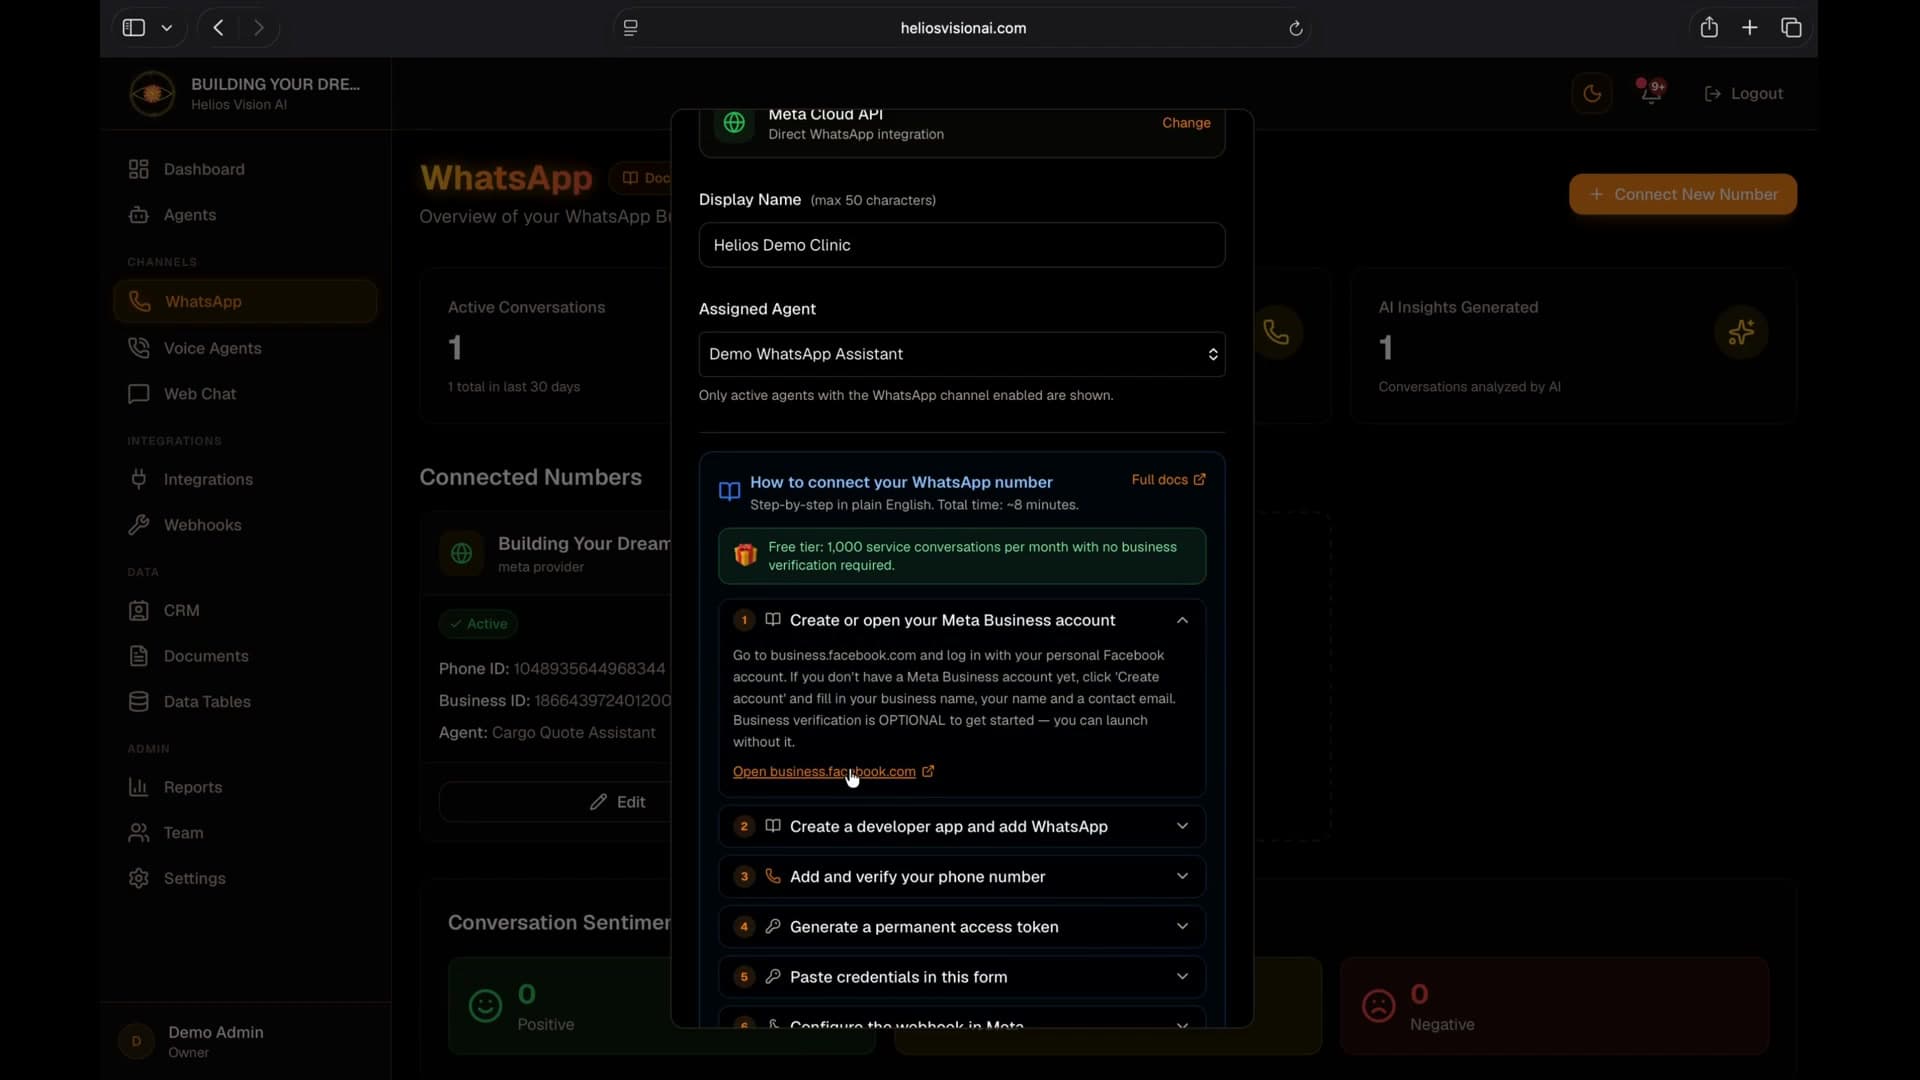
- Go to Meta Business Suite and log in with your personal Facebook account.
- If you don't have a Meta Business account yet, click Create account and fill in your business name, your name, and a contact email. Business verification is optional to get started — you can launch without it.
Step 2 — Create a developer app and add WhatsApp
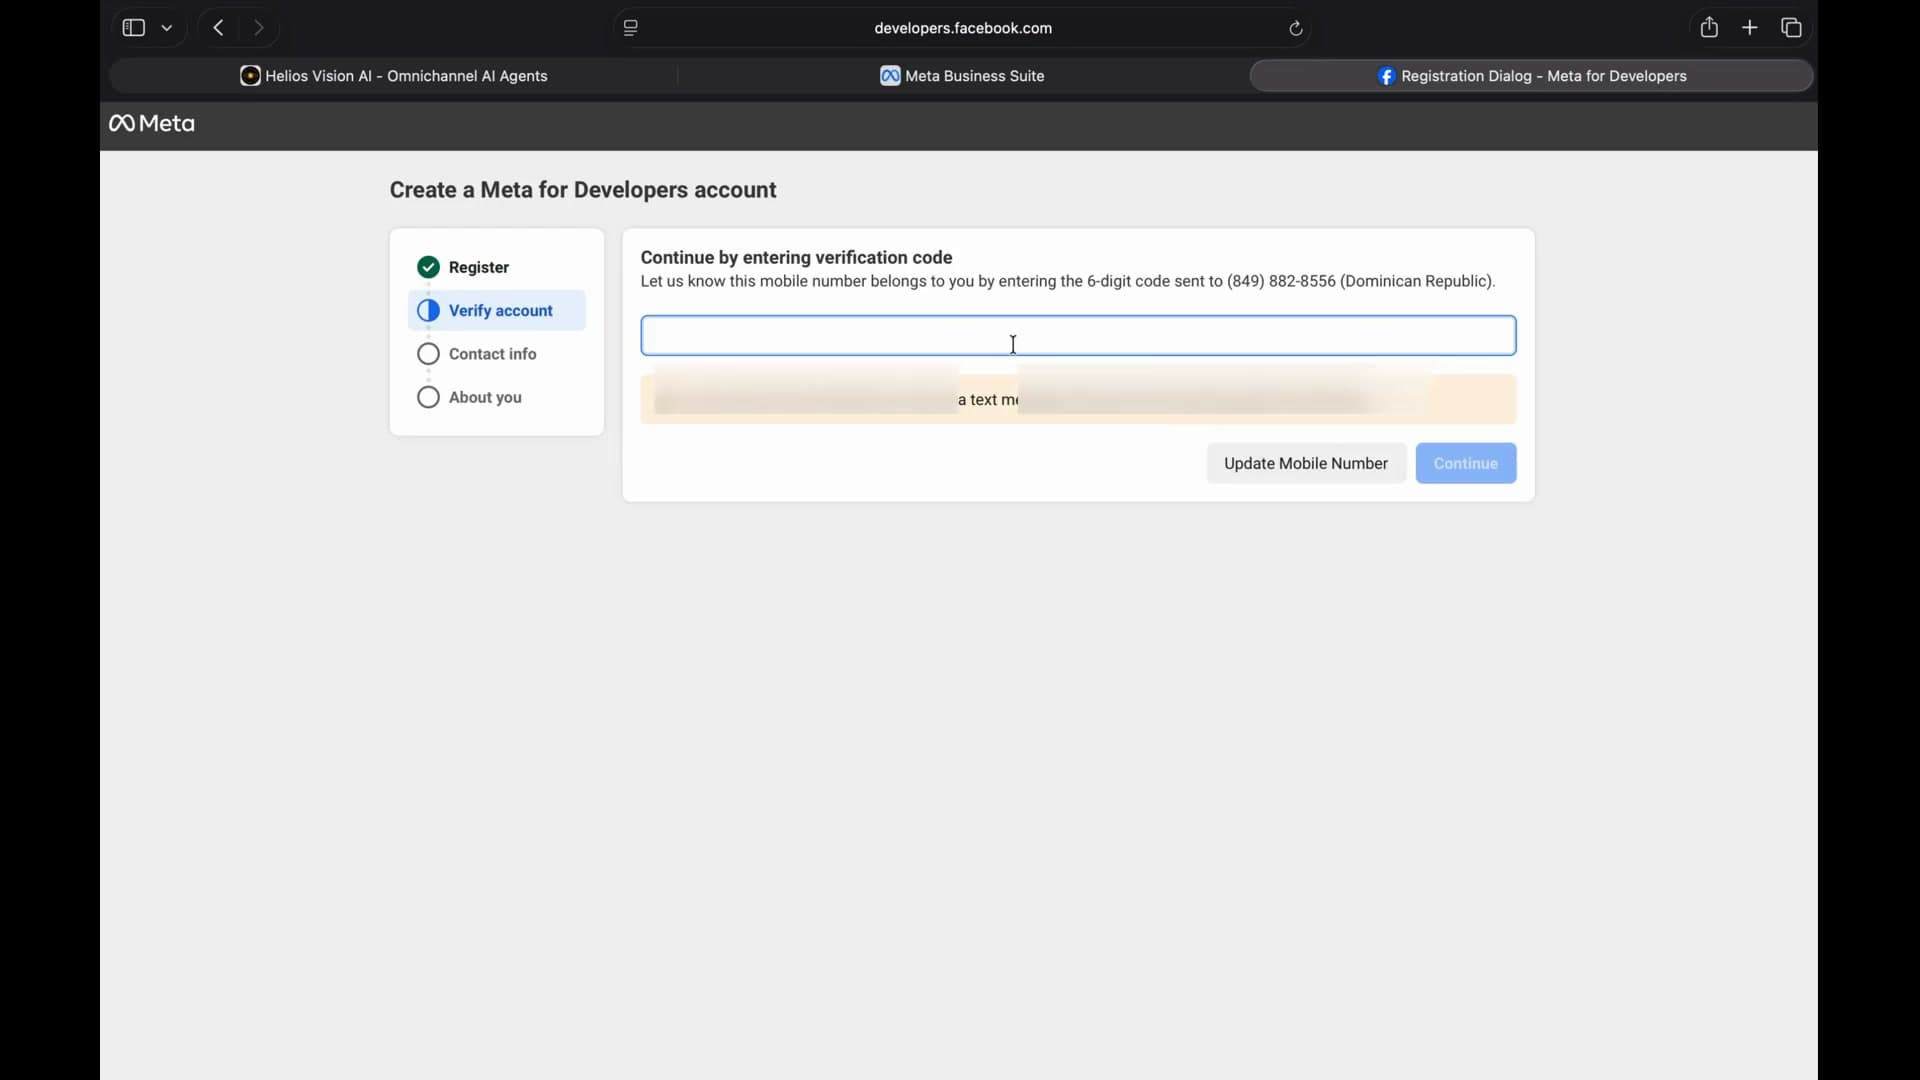
- Go to Meta for Developers → My Apps → Create App.
- Choose app type Business and name it whatever you want (only you see it).
- Associate it with your Meta Business account and click Create App.
- From the app dashboard, find the WhatsApp product card and click Set Up. Accept the WhatsApp Business terms.
Step 3 — Register your WhatsApp phone number
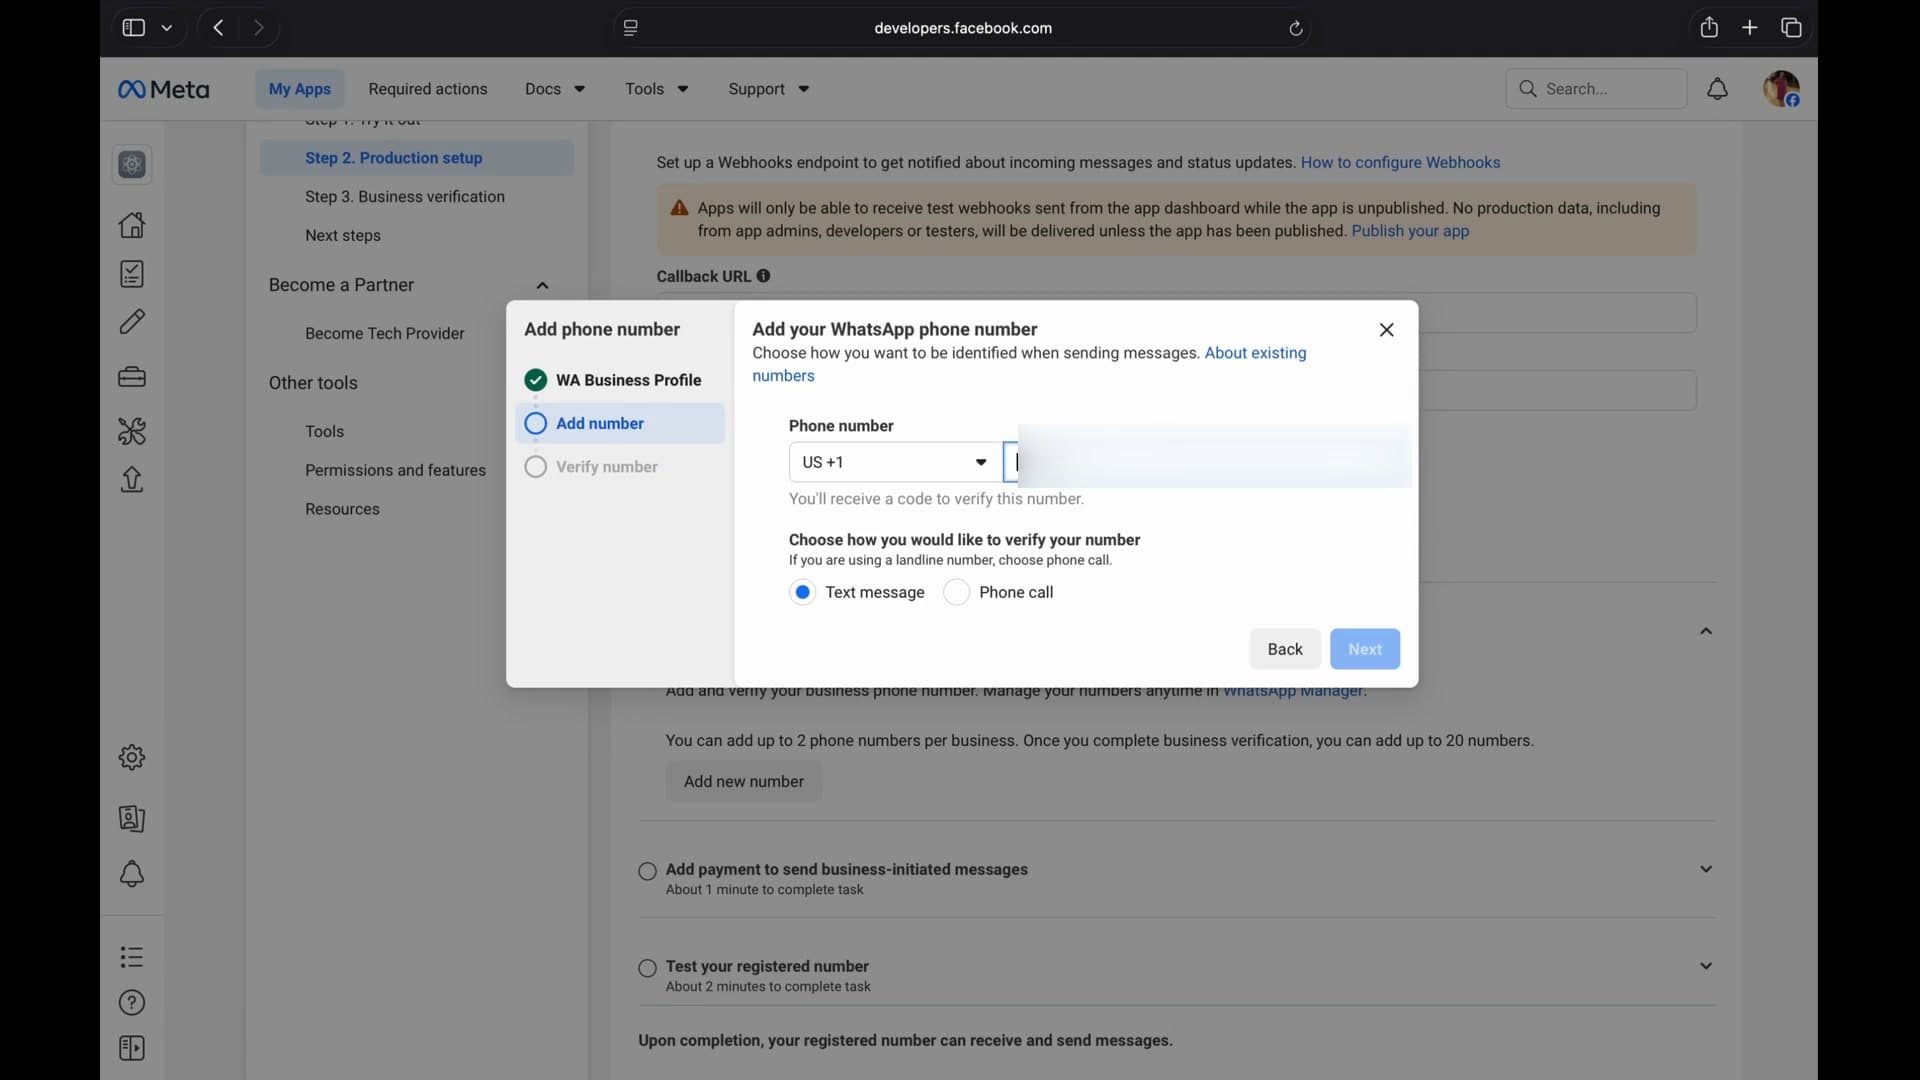
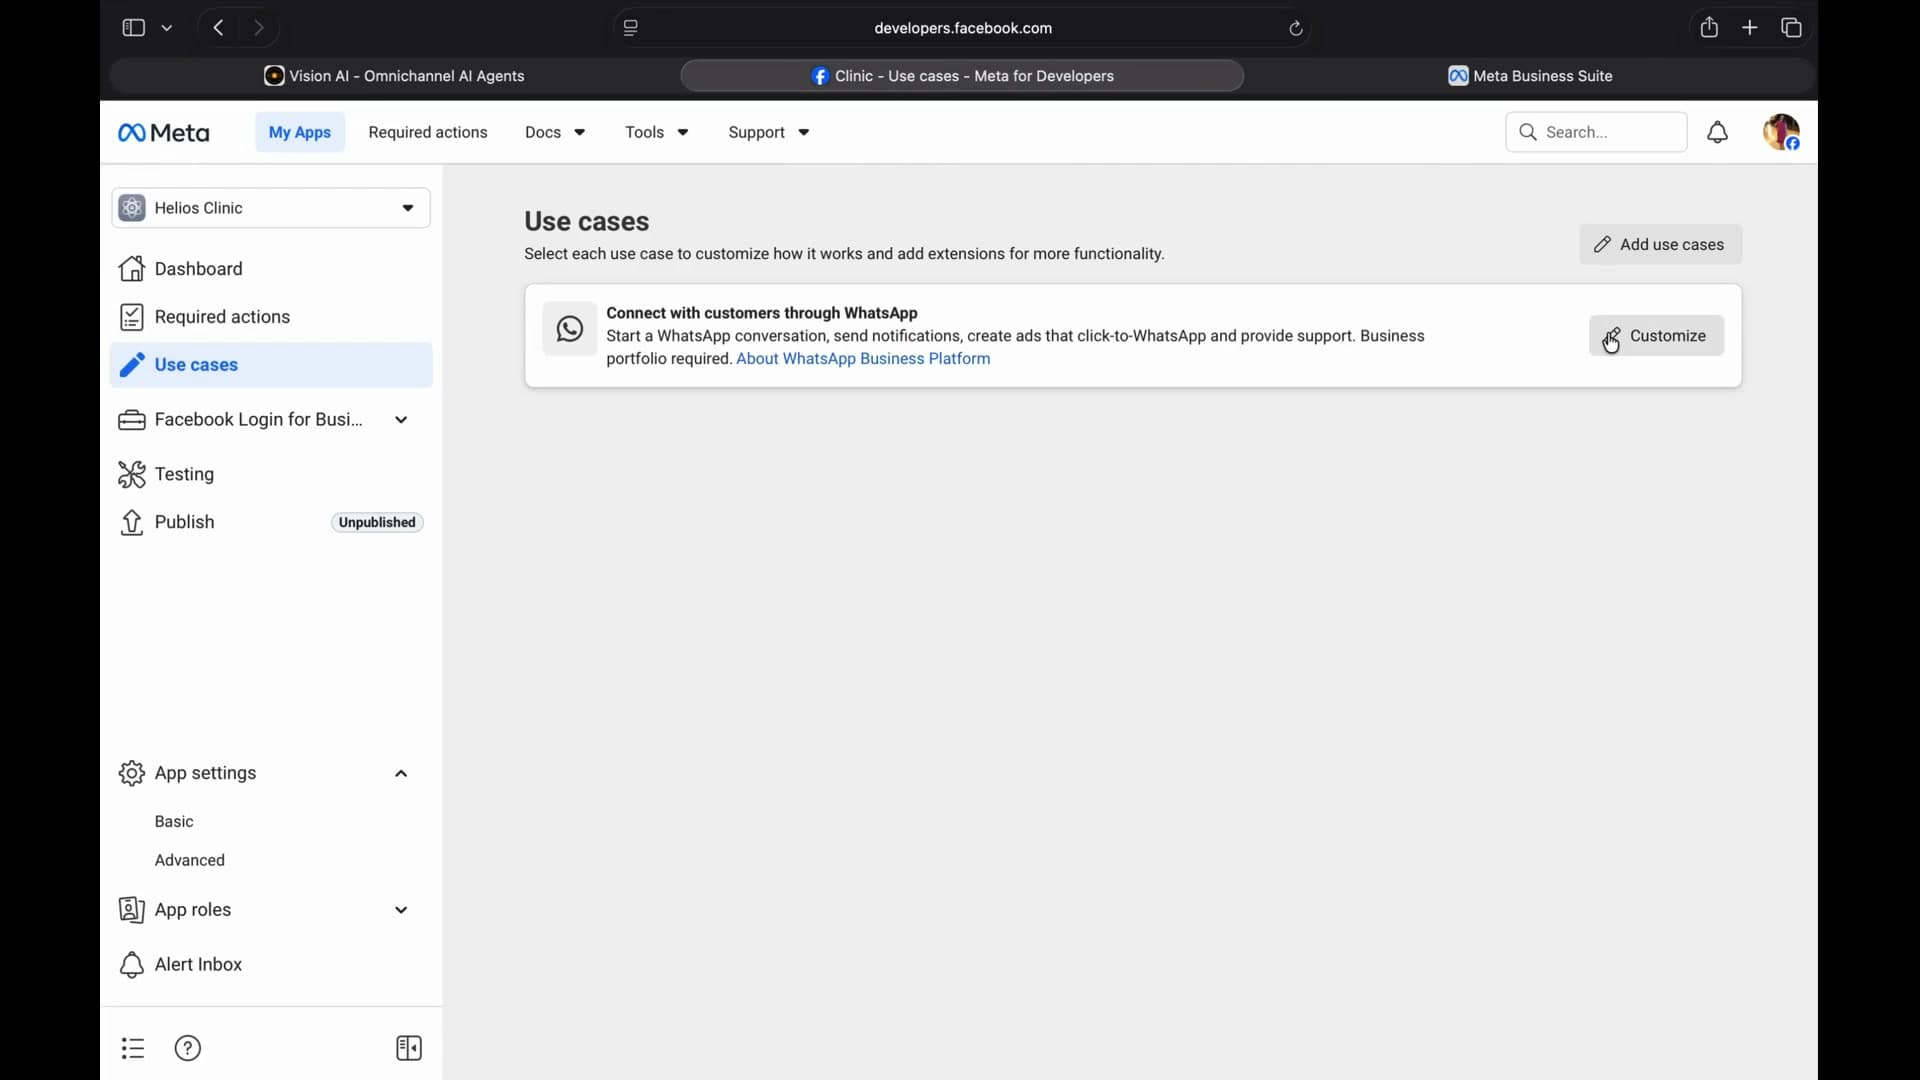
- In your app sidebar: Use Cases → "Connect with customers through WhatsApp" → Customize → Production setup.
- Select or create a WhatsApp Business Account (WABA). You can create one here, or in advance via Meta Business Suite → WhatsApp Manager.
- On the Register your WhatsApp phone number card, Meta auto-assigns a free test number you can use immediately. To use your own production number, click Add phone number, fill in the verified business name, category, and time zone, then verify with the SMS or voice code.
Warning: The number you register is deregistered from regular WhatsApp and only works via the API. Use a dedicated business number, or be ready to lose that number on your normal WhatsApp. If it's currently on WhatsApp, uninstall the app and wait a few minutes before registering it here.
Step 4 — Generate a permanent access token (System User Token)
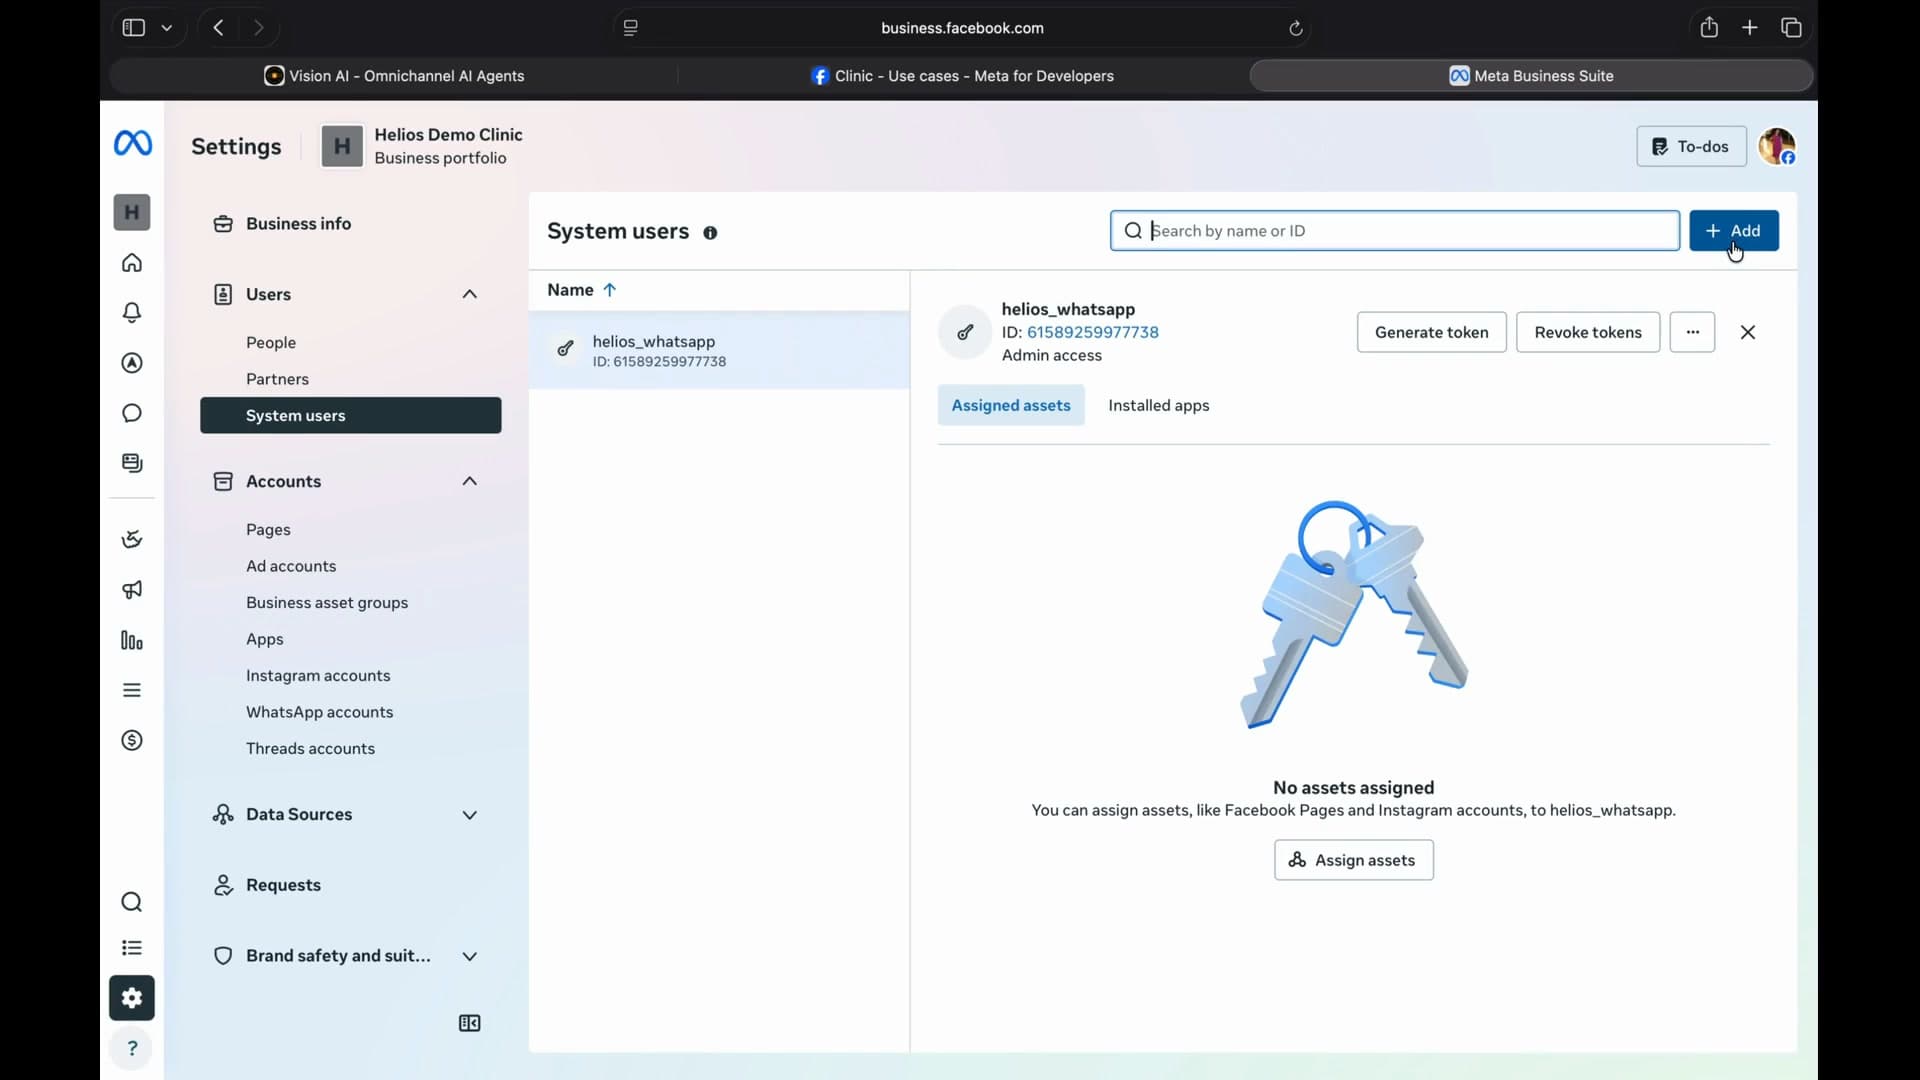
The token shown in Production setup expires in ~24 hours. For production you need a System User Token:
- Go to Meta Business Suite → Settings → Users → System Users.
- Click Add to create a user with role Admin.
- Select the System User → Add Assets:
- Apps → choose your WhatsApp app → enable Manage app → Save.
- WhatsApp Accounts → also add the WhatsApp Business Account and grant Full Control → Save. Without this, Helios fails with
missing_permissionswhen it binds the app to your WABA.
- Click Generate new token, select your app, and tick the permissions:
whatsapp_business_managementwhatsapp_business_messaging
- Click Generate token and copy it immediately — Meta shows it only once. It does not expire.
Step 5 — Get the App Secret
- In your app's left menu, go to Settings → Basic.
- Find App Secret, click Show, and enter your Facebook password.
- Copy the App Secret.
The App Secret lets Helios verify that webhooks really come from Meta (HMAC-SHA256 signature). It's optional but strongly recommended.
Part 2: Paste credentials in Helios
Step 6 — Connect the number in Helios
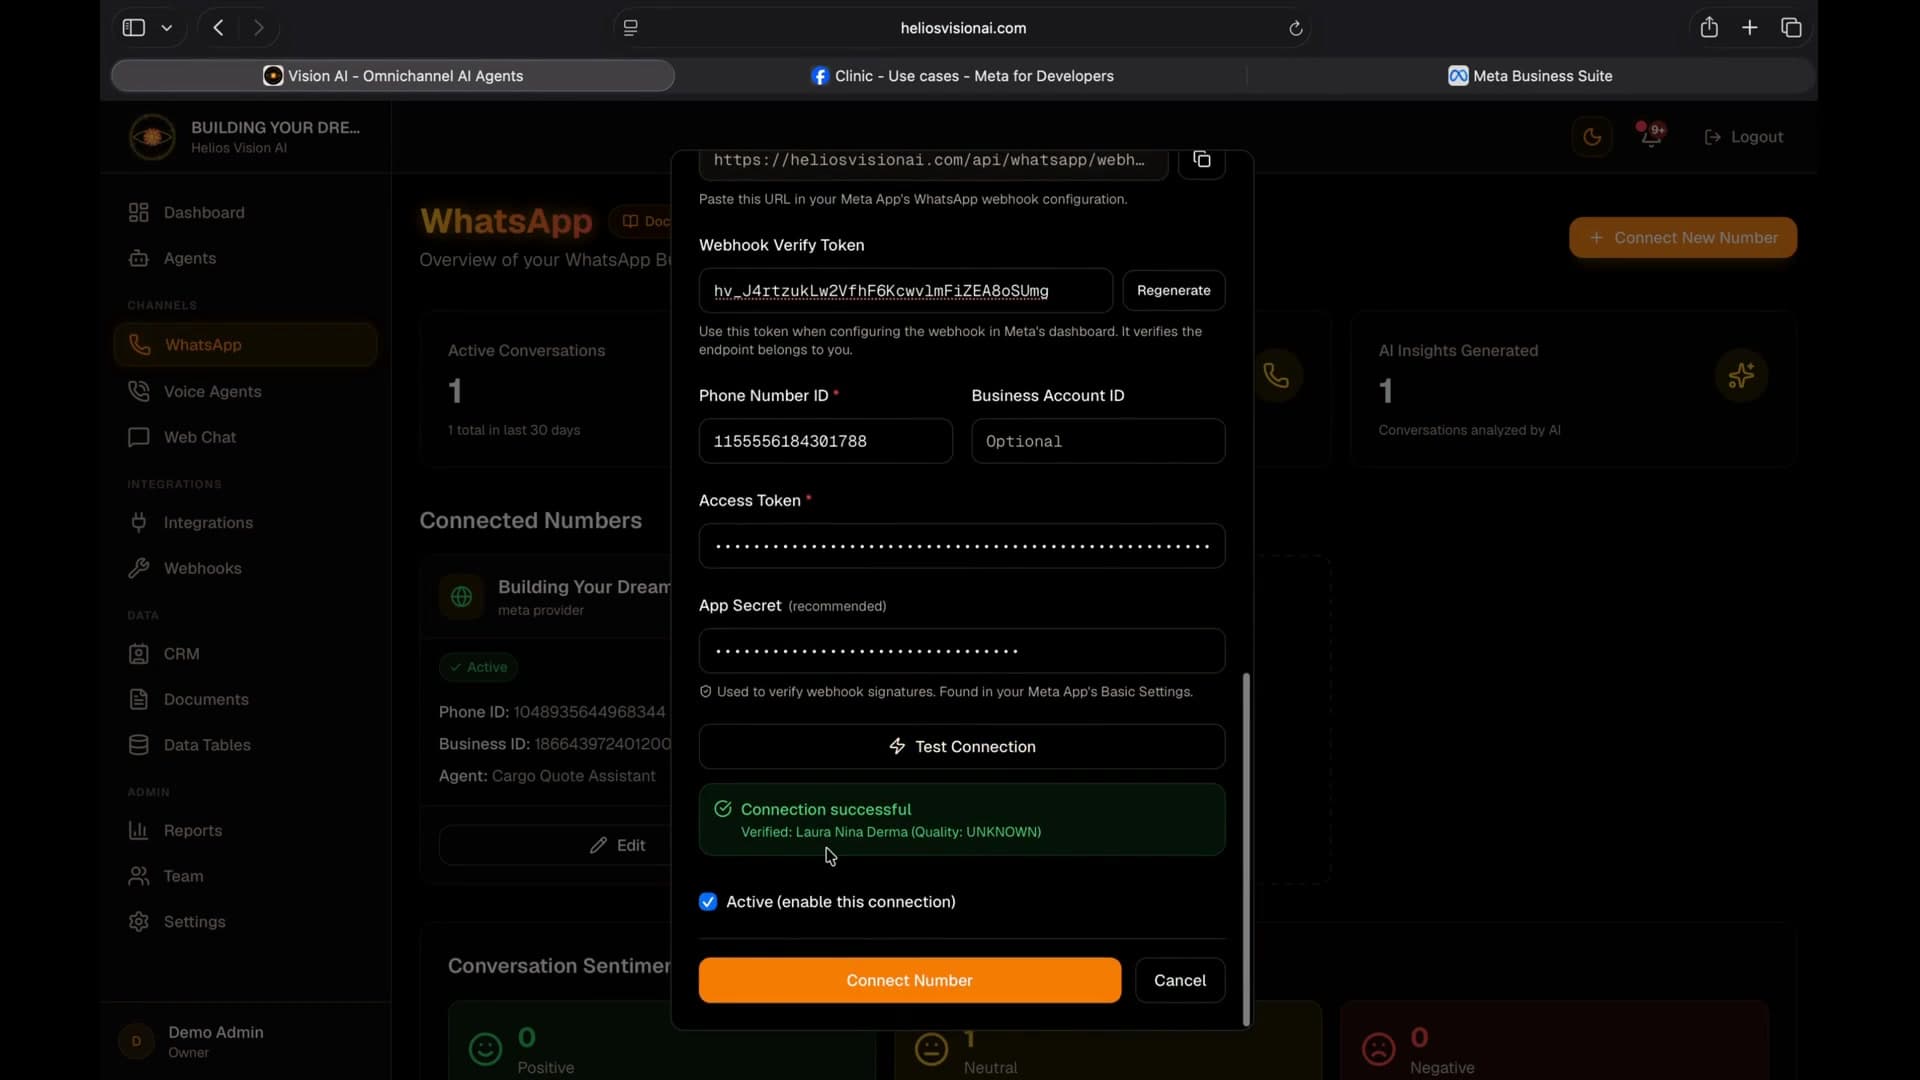
- In Helios, open WhatsApp in the sidebar.
- Click Connect New Number → select Meta Cloud API.
- Fill in:
| Field | Value | Required |
|---|---|---|
| Display Name | Friendly label for this number, max 50 characters (e.g. "Sales Support") | Yes |
| Assigned Agent | The active, WhatsApp-enabled agent that will process messages (or a team coordinator when Teams is enabled) | Yes when Active |
| Phone Number ID | The numeric ID from Production setup → Register your WhatsApp phone number (e.g. 123456789012345) | Yes |
| Business Account ID | The WABA ID. Leave blank — Helios auto-detects it from the Phone Number ID + token | No |
| Access Token | The System User Token from Step 4 (or a temporary token for testing) | Yes |
| App Secret | The secret from Step 5 | Recommended |
- Click Test Connection to verify. On success you see "Verified: <your business name>" (with the quality rating when Meta returns one). If Display Name is empty, Helios fills it with the verified name.
- Tick Active to make the number ready to receive messages.
- Click Connect Number. At this point Helios calls Meta's Graph API to bind your app to the WABA — the silent webhook gap that broke many integrations in the past.
Note: The Webhook URL and Webhook Verify Token you'll paste into Meta in Step 7 are shown at the top of this same form. The verify token (
hv_...) is generated and saved the moment the form opens, so Meta's verification works while you're still here. Use Regenerate only if you need a fresh token.
If "Connect Number" seems to do nothing, scroll to the button — there may be a hidden validation error, such as a missing Display Name or "Active WhatsApp numbers must have an assigned agent".
Editing an existing Meta connection
- Encrypted credentials (Access Token and App Secret) show a "Saved" indicator — the actual values are never displayed.
- Keep them, or click Replace with new token / Replace with new secret to enter new values.
- Test Connection works with the stored credentials — no need to re-enter them.
- Phone access control (allow/block lists) is available in edit mode only.
Part 3: Configure the webhook in Meta
Step 7 — Register the webhook URL
Meta has two separate subscription levels, and confusing them costs people days of debugging:
- App-level field subscription — you do this (Step 7).
- WABA-level app subscription — Helios does this for you (see "What Helios automates for you").
Both must be in place for webhooks to arrive. Now configure the field-level subscription:
- Back in Meta for Developers, in your app: Use Cases → "Connect with customers through WhatsApp" → Customize → Production setup.
- Find the Configure Webhooks card and click Configure (or Edit if it's already set up).
- Fill in:
- Callback URL: paste the Webhook URL shown in Helios (e.g.
https://heliosvisionai.com/api/whatsapp/webhook). - Verify Token: paste the Webhook Verify Token from Helios (
hv_...).
- Callback URL: paste the Webhook URL shown in Helios (e.g.
- Click Verify and Save. Meta sends a GET to your URL to confirm the token matches.
- Meta normally subscribes the
messagesfield for you as part of this step. To double-check (5 seconds), open WhatsApp → Configuration → Webhook fields, find themessagesrow, and confirm it shows Subscribed (green). While you're there you can also subscribemessage_statusfor delivery / read receipts.
If verification fails: confirm the URL is HTTPS, the domain is publicly reachable (not localhost), and the token matches exactly the one Helios generated.
Part 4: Payment method and publishing the app
Skipping either of these last two steps produces the same symptom: zero inbound messages, no error anywhere.
Step 8 — Add a payment method (required for AI numbers)
Meta's free tier of 1,000 service conversations per month does not cover AI phone numbers. Without a payment method, Meta silently drops every inbound message — no error in the Meta dashboard, no rejection in Helios, just silence.
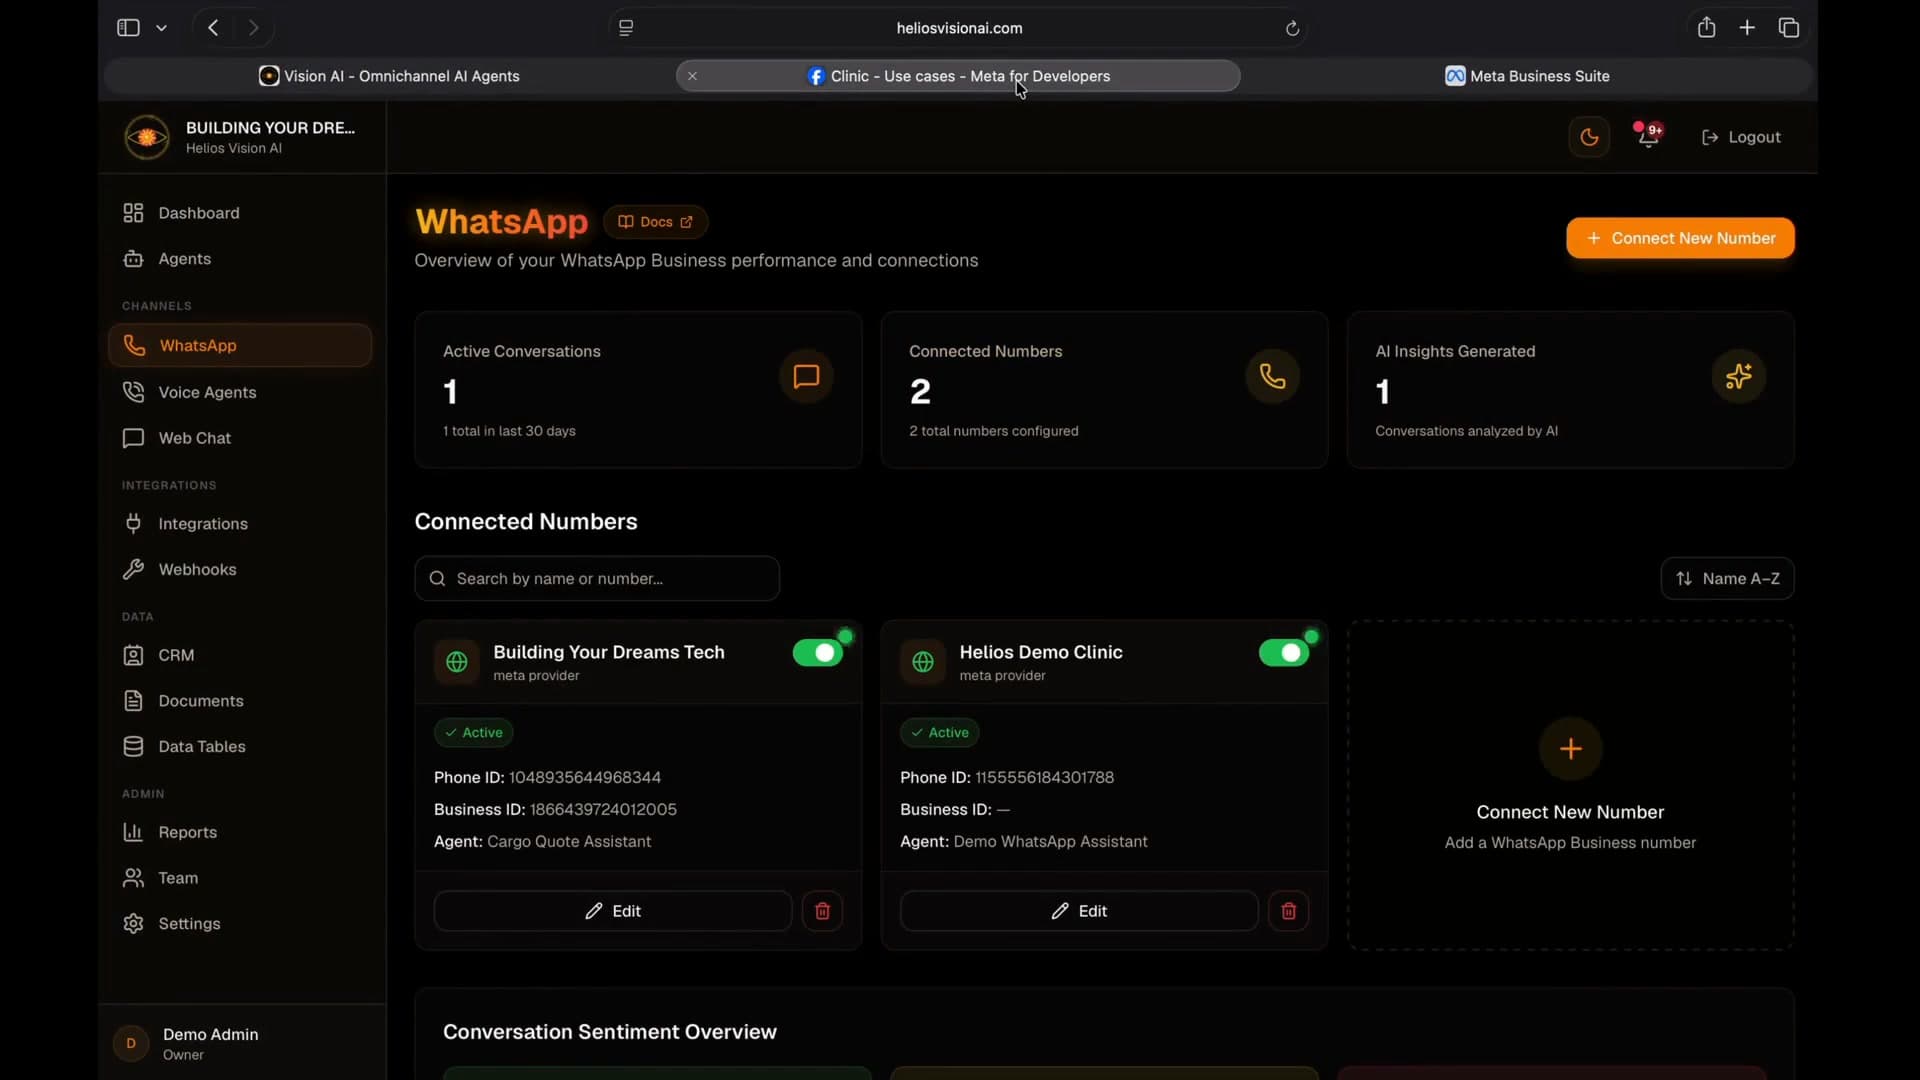
- Go to Use Cases → "Connect with customers through WhatsApp" → Customize → Production setup.
- Find the card "Add payment to send business-initiated messages" (the wording also covers AI-initiated traffic).
- Click Add payment method, enter your card, and save.
Cost reality check: ~$0.005–$0.02 USD per service conversation depending on country. A few cents covers extensive testing.
Step 9 — Publish the app (App Mode → Live)
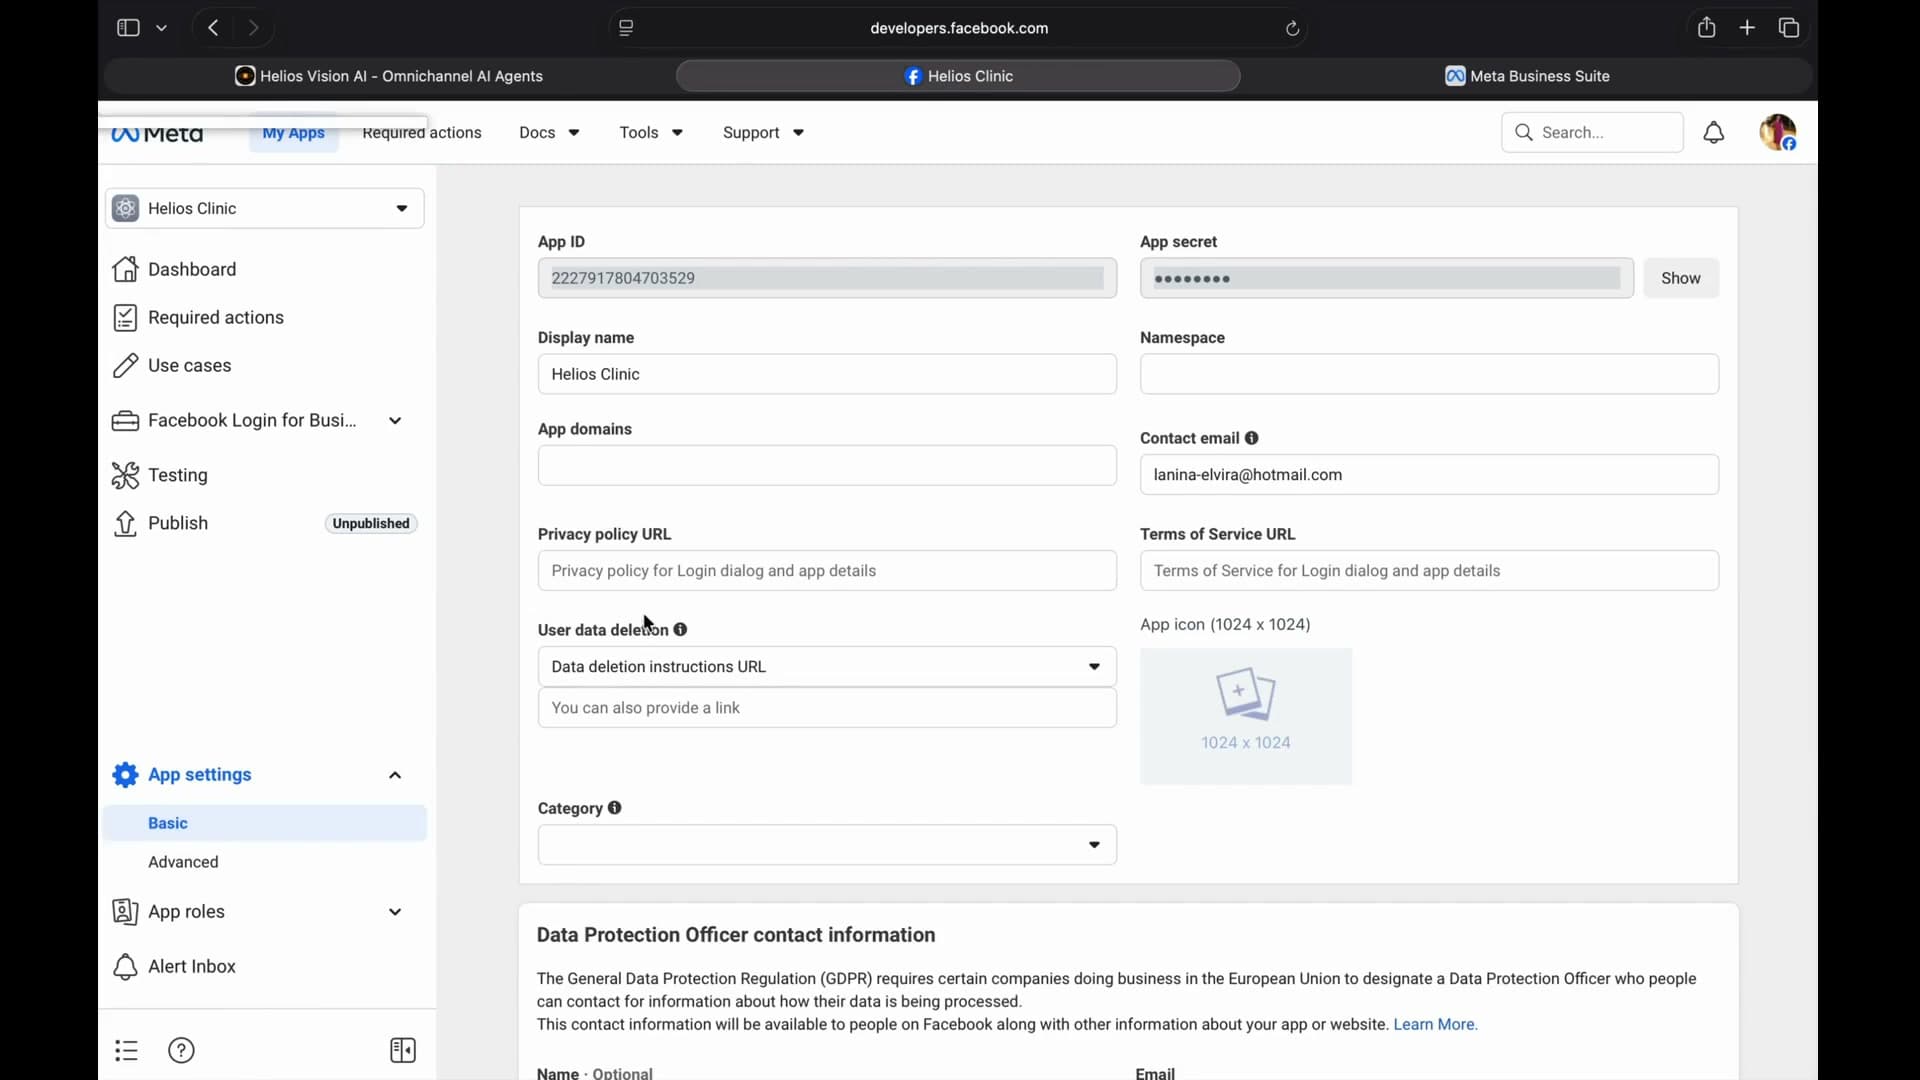
Apps in Development mode never deliver real production webhooks — not even for app admins or testers. Meta retains every inbound message on its side and your webhook receives nothing.
- In your app dashboard, look for "Check that all requirements are met, then publish your app".
- Complete the basic requirements Meta lists:
- Privacy Policy URL — required.
- Terms of Service URL — required.
- Data Deletion URL — required.
- App Icon (1024x1024 PNG).
- Category: "Business and Pages".
- Business use description (a short paragraph about your use case).
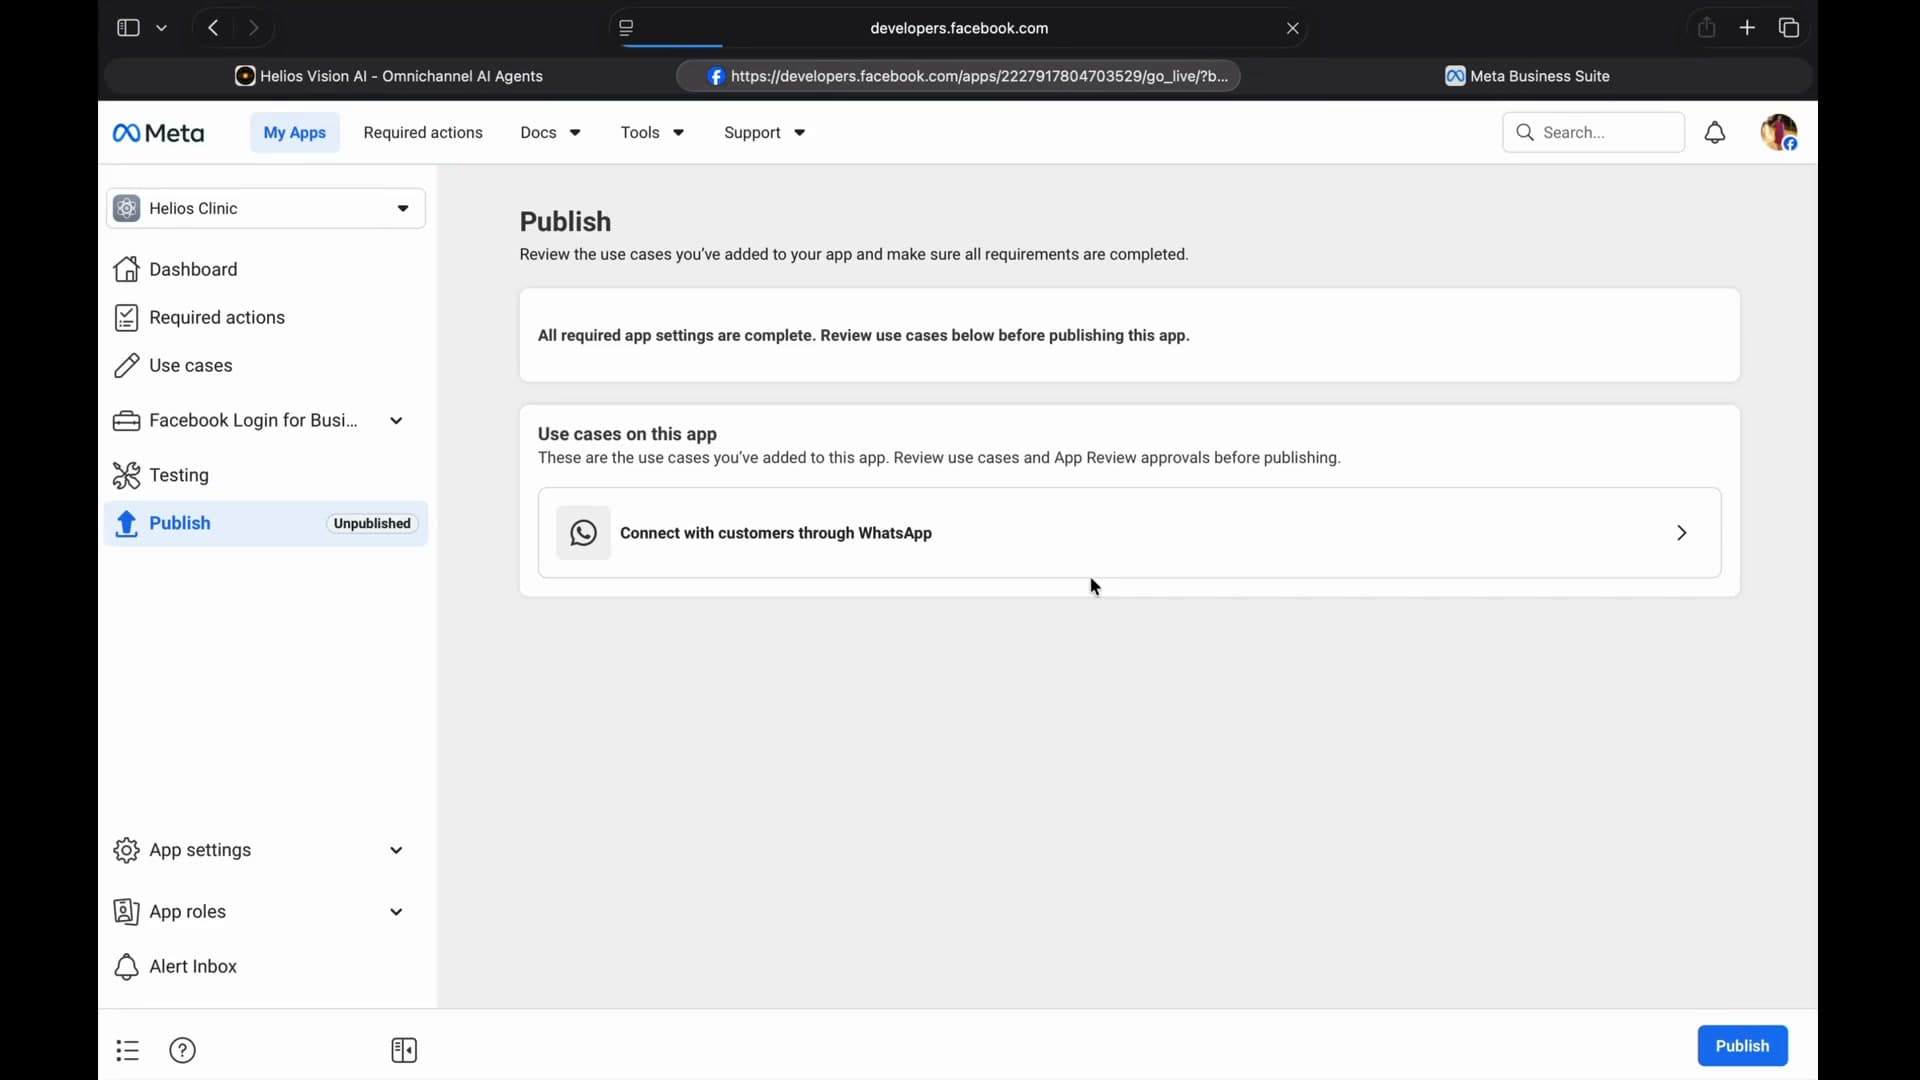
- Once the requirements are met, Meta enables the Publish button. Click Publish.
No App Review required: WhatsApp Business Messaging does not need formal App Review. Live mode activates instantly once the basic fields are filled.
Which URLs do I use for Privacy / Terms / Data Deletion?
- Ideal: your own legal pages if you already publish them (e.g.
https://yourcompany.com/privacy). They name your business as the data controller, which is exactly what Meta wants to see. - Fallback: Helios generates ready-to-use, per-tenant legal pages for you:
https://heliosvisionai.com/privacy/{your-slug}https://heliosvisionai.com/terms/{your-slug}https://heliosvisionai.com/data-deletion/{your-slug}
Grab the exact URLs (with one-click copy) and edit your business name, contact info, and address in Helios under Settings → Legal & Compliance. The same page lets you override any of the three with your own external link.
Why per-tenant URLs, not the platform
/privacy: under GDPR/CCPA you are the data controller of your customers' data; Helios is only the data processor. Meta's review expects the URLs to describe your business — name, contact, disclosures — not the underlying platform. The platform-level page describes Helios itself and won't pass a tenant submission.
Step 10 — Click Connect Number
You already picked the agent and toggled Active at the top of the form, so the only thing left is to click Connect Number. Helios automatically subscribes this app to your WhatsApp Business Account so inbound messages reach the webhook — you do not do this in Meta. Send a test WhatsApp from another phone and your agent should reply within seconds.
If the message reaches Helios but no reply is generated, check:
- The assigned agent has the WhatsApp channel enabled.
- The agent has a system prompt configured.
- The server logs for processing errors.
Common silent failures (no error, no message)
These are the usual suspects when "everything looks right but nothing arrives". Helios solves the third one for you; the first two are still on you.
| Silent failure | Root cause | Fix |
|---|---|---|
| Inbound messages never arrive, dashboard looks fine | Payment method not added (Step 8) | Add a card under Use Cases → "Connect with customers through WhatsApp" → Customize → Production setup → "Add payment…" |
Webhook is verified, messages is subscribed, still nothing | App is in Development mode (Step 9) | Publish the app via the dashboard requirements checklist |
| Brand-new tenant: webhook configured but no events ever fire | App not subscribed to the WABA at the WABA level | Helios does this automatically when you click Connect Number. If you connected before this behavior existed, click Edit → Test Connection → Save to re-trigger the bind |
Connection error codes
When Helios can't connect or bind your number, the modal shows an actionable message. Internally these map to typed codes (meta_bind:<code>):
| Code | Meaning | Fix |
|---|---|---|
invalid_token | Meta rejected the access token (expired, wrong app, or missing scopes) | Regenerate the System User Token (Step 4) and paste it again |
missing_permissions | The token lacks whatsapp_business_management on this WABA | In Business Settings → System Users, grant the System User Full Control over the WhatsApp Account (not just the App), regenerate the token, and paste it again |
waba_not_found | The token can't see the WABA for this Phone Number ID | The token belongs to a different Meta app than the number. Generate a token from the System User scoped to the correct app |
invalid_phone_number_id | Meta rejected the Phone Number ID | Re-copy it from Production setup → Register your WhatsApp phone number (numeric, no hyphens) |
network_error | Transient connectivity issue with Meta | Retry in a few seconds. If it persists, check Meta's status page |
Temporary vs permanent token
| Feature | Temporary Token | System User Token |
|---|---|---|
| Lifetime | ~24 hours | Permanent |
| Generated where | Production setup (Use Cases → Connect with customers through WhatsApp → Customize) | Meta Business Suite → System Users |
| Recommended for | Initial testing | Production |
| Shown again | Yes (regenerable) | Only once |
For production, always use a System User Token. If you use the temporary one, your integration stops working when it expires.
Meta Cloud API costs
Meta charges per conversation (a 24-hour window), not per individual message:
| Conversation type | Cost |
|---|---|
| User-initiated (service) on AI numbers | ~$0.005–$0.02 USD per conversation (varies by country). The 1,000-free-per-month tier does not apply |
| Business-initiated (marketing, utility, authentication) | Priced per conversation by category and country |
| Messages within an open 24-hour window | No additional cost once the conversation is open |
See Meta's current pricing for your region.
Good practices
- Use a dedicated business number you're willing to deregister from consumer WhatsApp.
- Always use a System User Token for production — never leave the ~24-hour temporary token in place.
- Add the App Secret so webhook signatures are verified (HMAC-SHA256).
- Run Test Connection before saving; a green "Verified" result confirms the token and Phone Number ID before Helios attempts the WABA bind.
- Add the payment method and publish the app before you expect real traffic — both are silent when missing.
Common errors
| Problem | Likely cause | Fix |
|---|---|---|
| Test Connection fails | Phone Number ID or Access Token wrong or expired | Confirm the Phone Number ID is numeric and the token is valid |
| Webhook won't verify in Meta | URL not reachable or token mismatch | Use HTTPS on a public domain (not localhost); confirm the token matches the one Helios generated |
| "Connect Number" does nothing | Hidden validation error | Scroll up — likely "Active WhatsApp numbers must have an assigned agent" or a missing Display Name |
| Invalid signature (401) on webhook | App Secret wrong or missing | Re-copy the App Secret from Meta → Settings → Basic and save it in Helios |
| Token expired | Using a temporary token | Create a permanent System User Token (Step 4) |
| Connect action opens an upgrade prompt | Plan doesn't include WhatsApp, or you're at your number limit | Purchase a WhatsApp add-on or upgrade the plan |
Quick checklist
- Step 1: Meta Business account
- Step 2: Create app (Business type) and add the WhatsApp product
- Step 3: Register your WhatsApp phone number under a WABA
- Step 4: Permanent System User Token with
whatsapp_business_management+whatsapp_business_messaging(Full Control on the WhatsApp Account, Manage app on the App) - Step 5: Copy the App Secret from Settings → Basic
- Step 6: In Helios, paste credentials → Test Connection → Connect Number (Helios auto-binds the WABA)
- Step 7: In Meta, paste the Webhook URL + Verify Token → Verify and Save → confirm
messagesis Subscribed - Step 8: Add a payment method (required for AI numbers)
- Step 9: Publish the app (Development → Live)
- Step 10: Send a test WhatsApp from another phone and confirm the agent replies
Related
- whatsapp — General WhatsApp manual (conversations, templates, notifications)
- twilio-setup — Alternative setup with Twilio
- integrations — General integrations